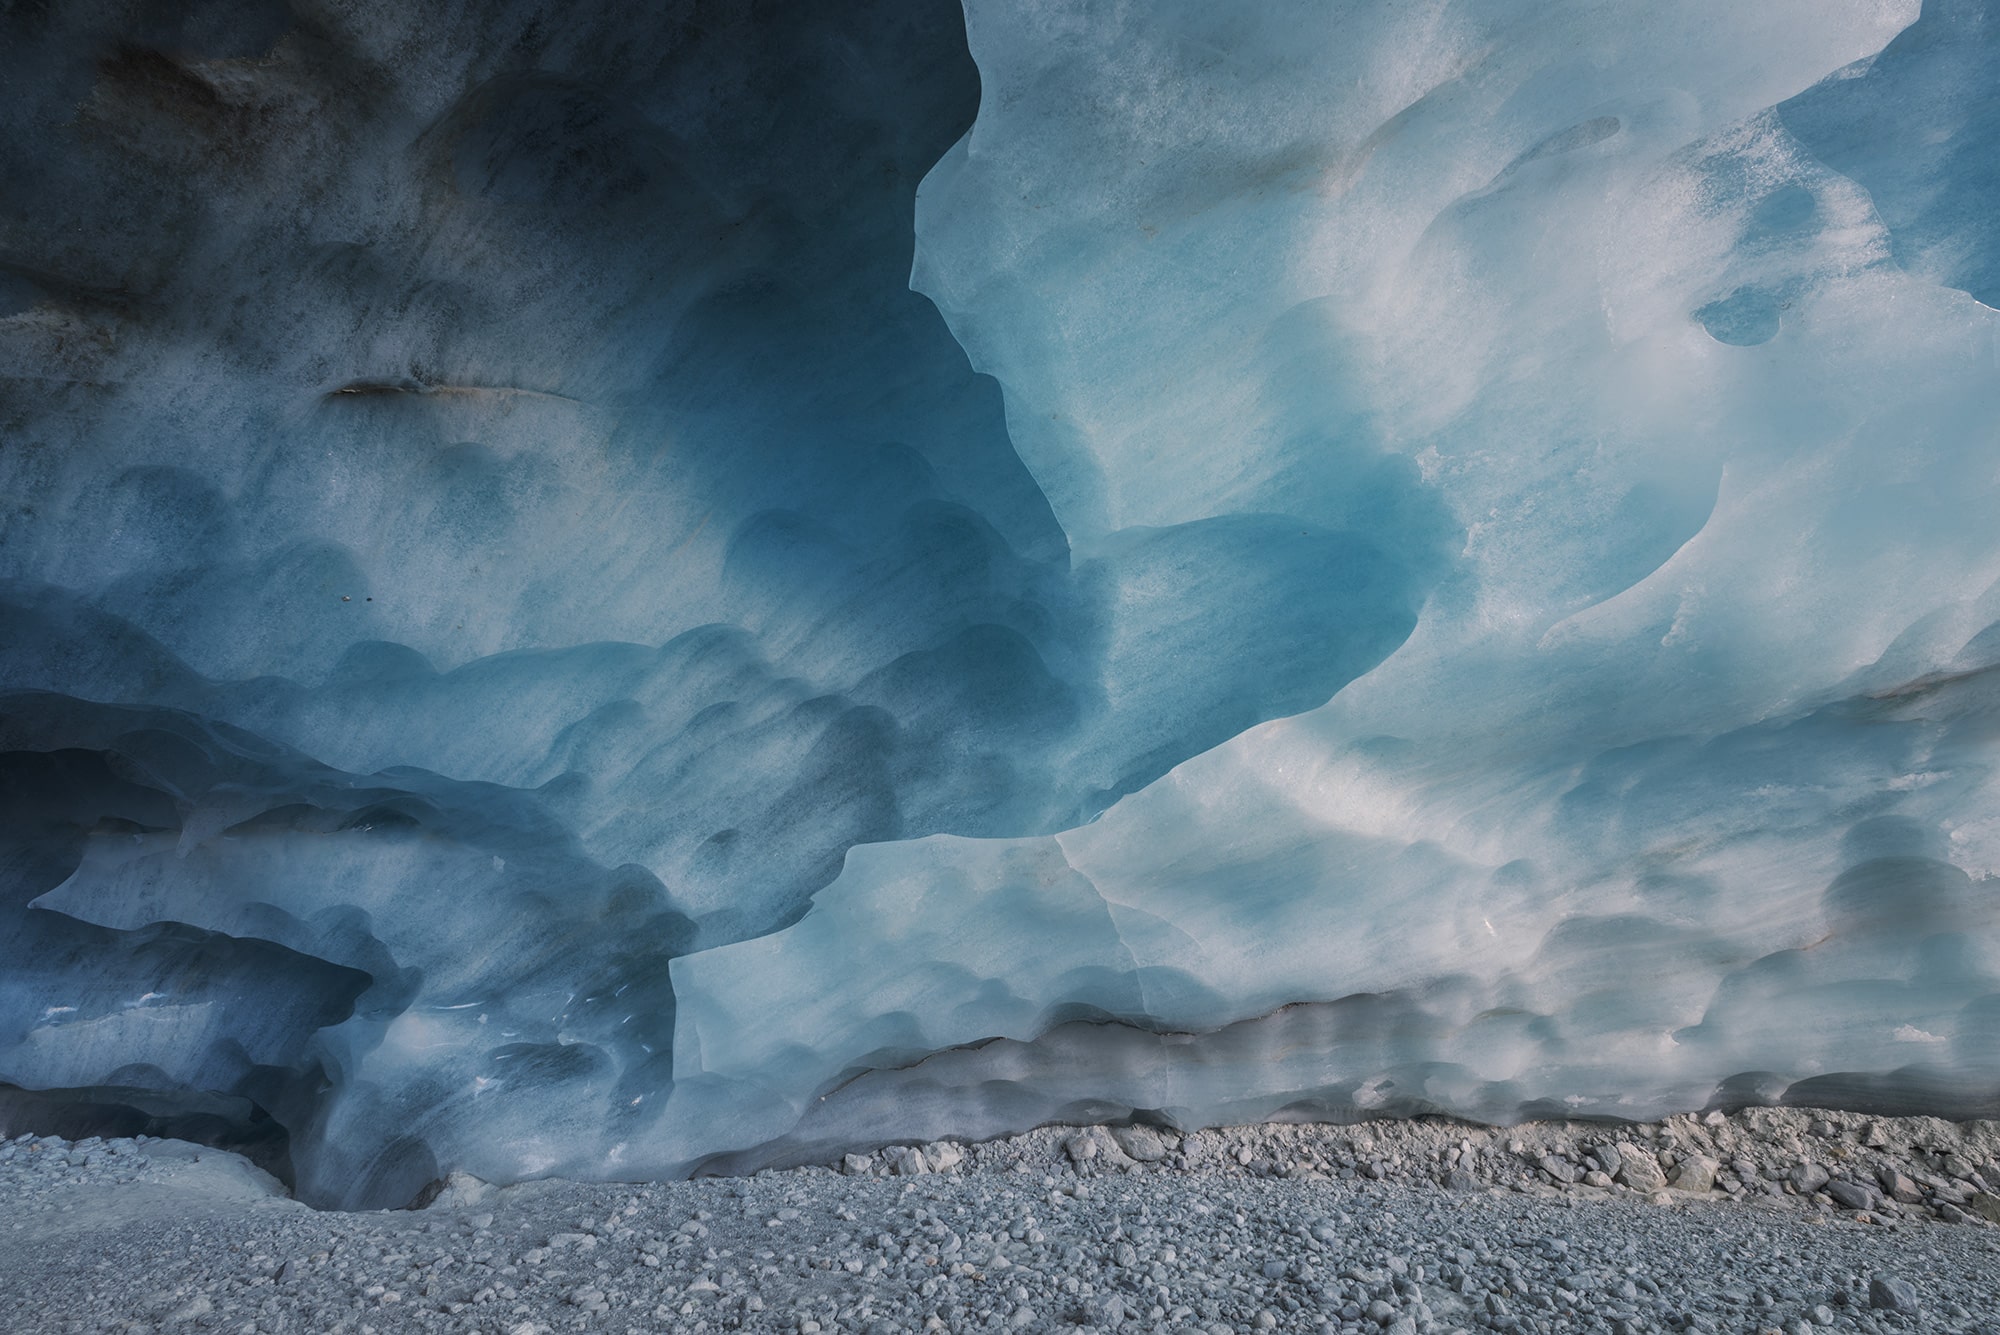
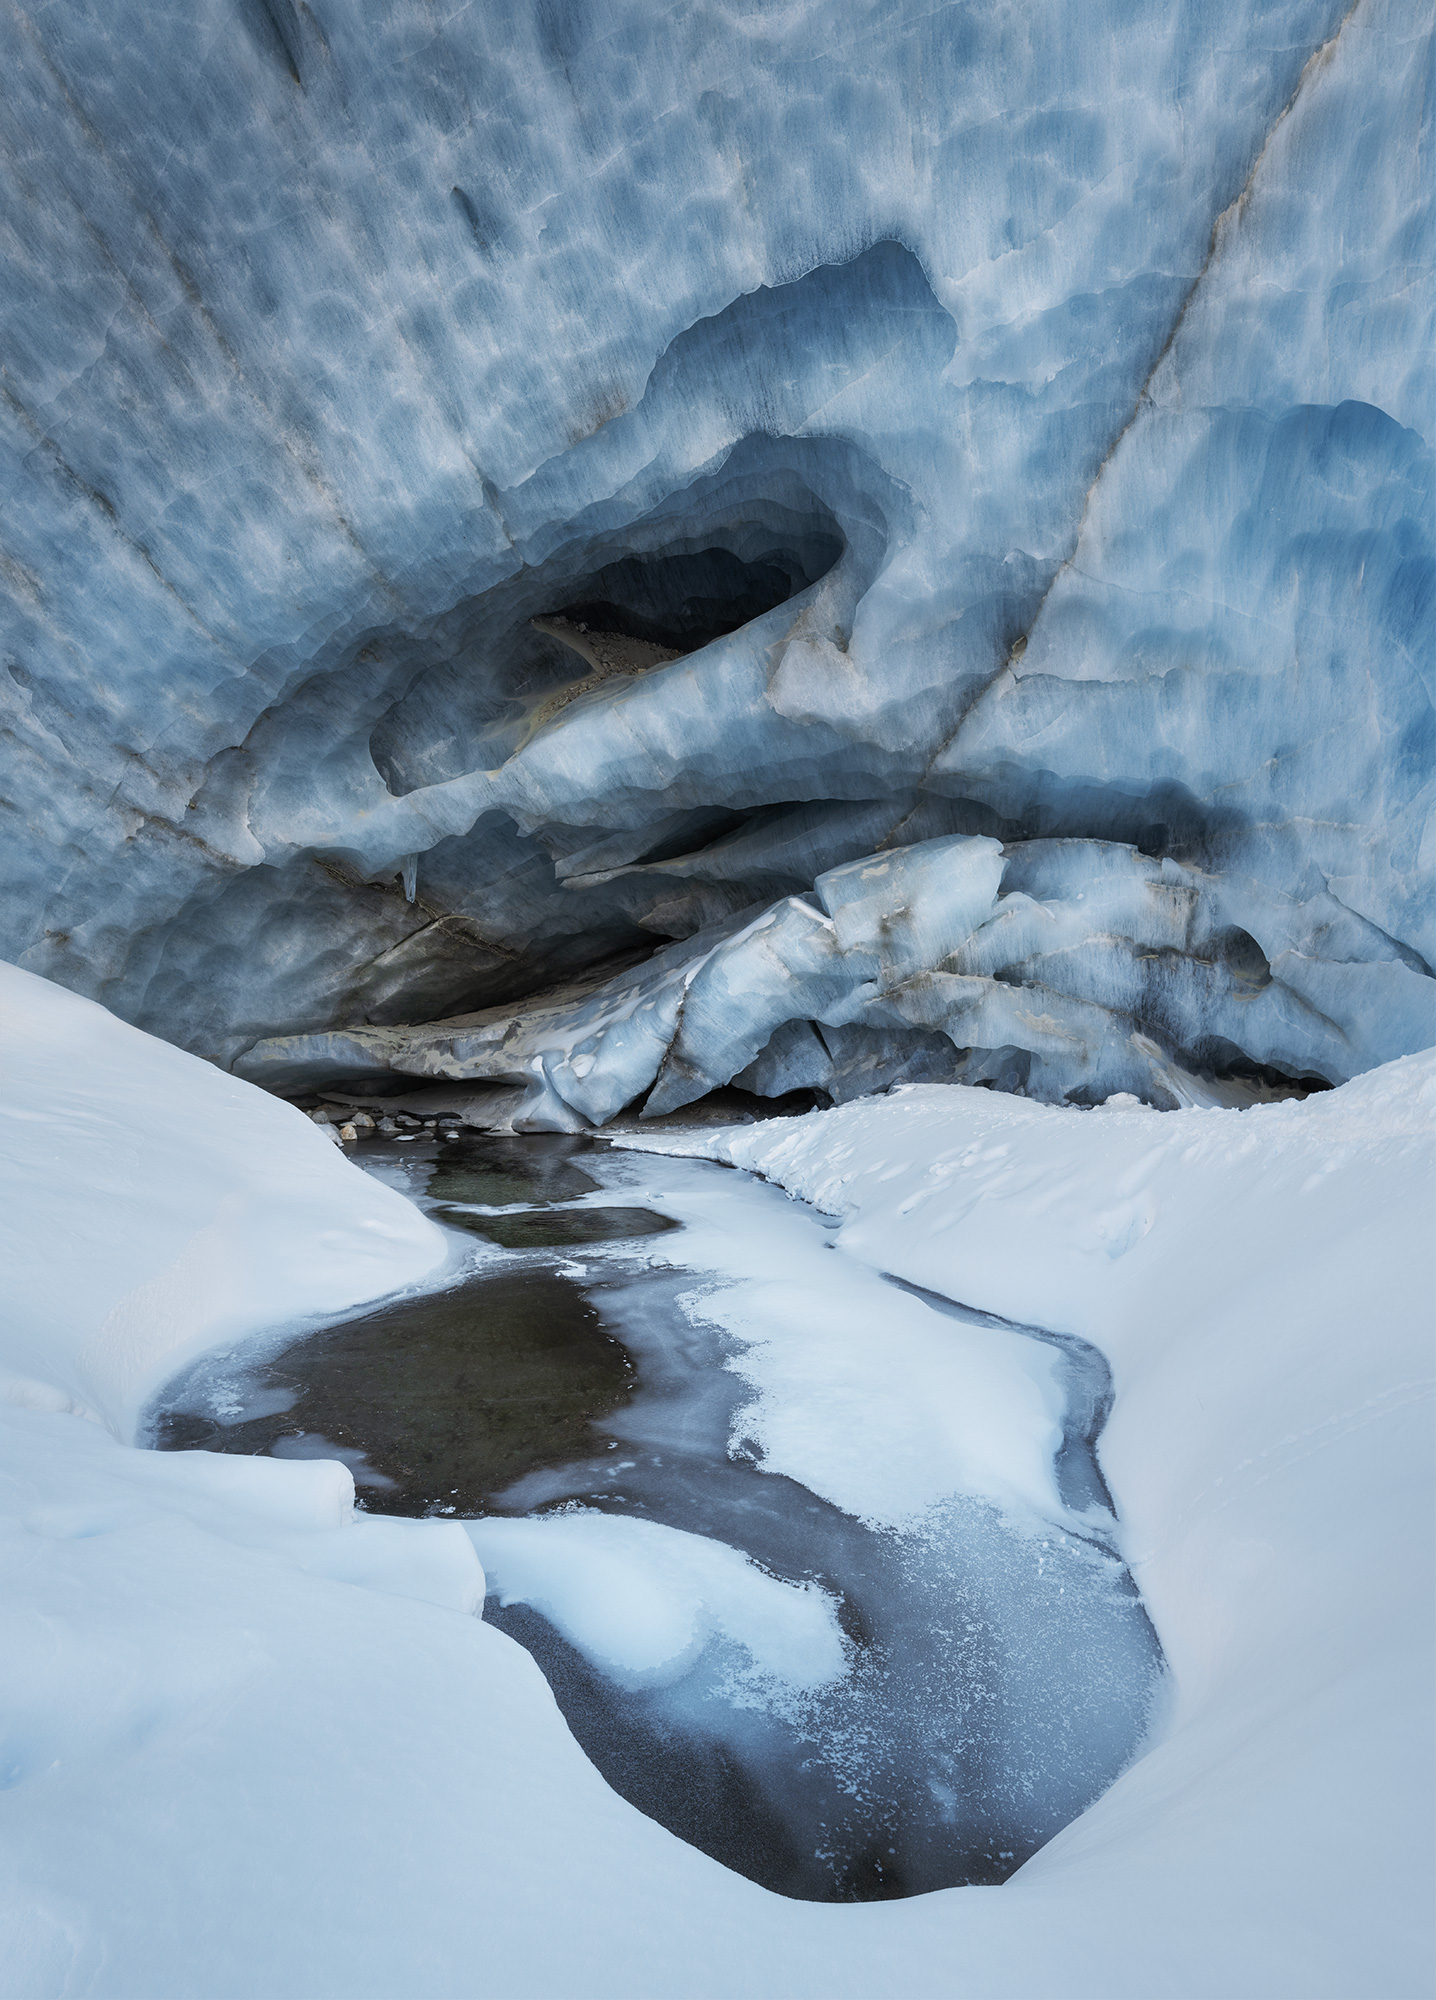
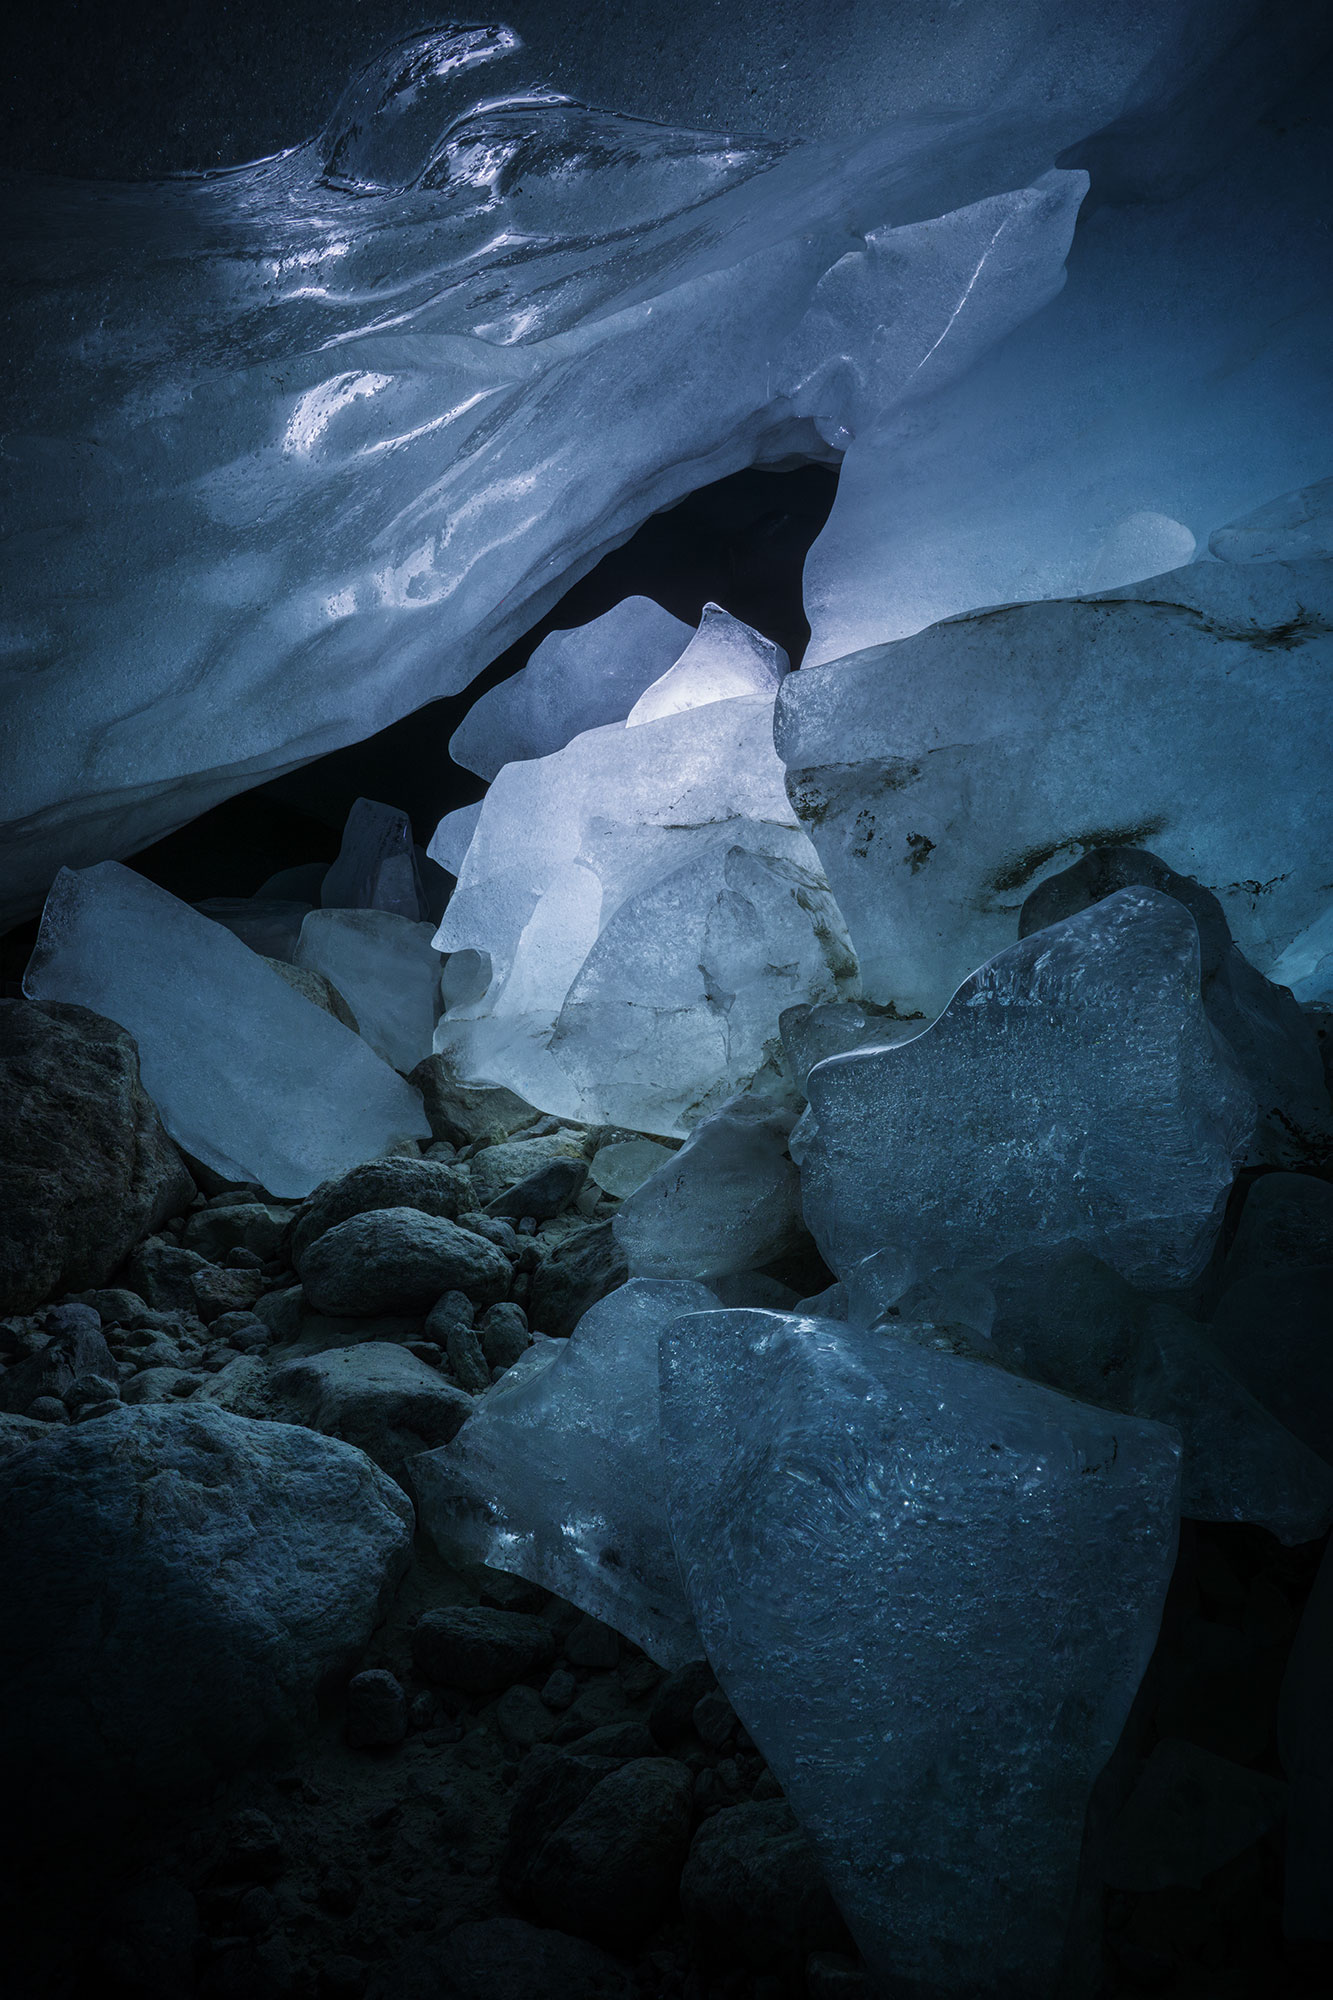
Zinal ice cave photography is a journey through time, silence, and melting beauty. Tucked away in the Swiss Alps, above the quiet village of Zinal, lies a hidden world of turquoise ice and delicate silence. This ephemeral glacier cave, carved each year at the base of the Zinal Glacier, is one of Switzerland’s most magical winter landscapes and one of its most fragile.
Over three winters, I’ve returned with my camera and my heart open, watching the cave evolve: collapsing, shifting, glowing, breathing. Photographing the Zinal ice cave is a race against time and light.
In this article, I take you behind the scenes of my glacier photography journey: what to expect, how to prepare, what gear to bring, and when to go. Whether you’re planning a photo expedition to the Swiss Alps or simply curious about shooting inside an ice cave, I hope this story inspires you to see this vanishing beauty with new eyes.
Stay safe, stay prepared – how to visit the Zinal ice cave responsibly
The Zinal ice cave is usually accessible from late November to mid-March, when temperatures are low enough to keep the structure stable. Outside of winter, entering the cave becomes extremely dangerous due to melting ice and shifting glacier walls.
As with any alpine hike in Switzerland, exploring the Zinal glacier requires preparation and awareness. Conditions can change quickly in the mountains, and it’s important to check the avalanche risk, weather forecast, and trail access before heading out.
Here’s what I always look at in the days before my trip and on the morning I leave. I only go if everything aligns perfectly.
➜ Avalanche bulletin
➜ Val d’Avinniers webcams
➜ Ski slopes openings
➜ Swiss weather
Consider a private guide for your Zinal ice cave visit
If you prefer not to go alone, you can book a local guide to lead you to the Zinal ice cave. An experienced guide will ensure your safety and share insights about the glacier, the landscape, and how the cave changes each winter.
You’ll find all the information and contact details for booking a guided tour on the official Val d’Anniviers website.
Zinal ice cave hike – practical info before you go
The trail to the Zinal ice cave begins at the parking area at the very end of the village of Zinal.
➜ The starting point just past Zinal
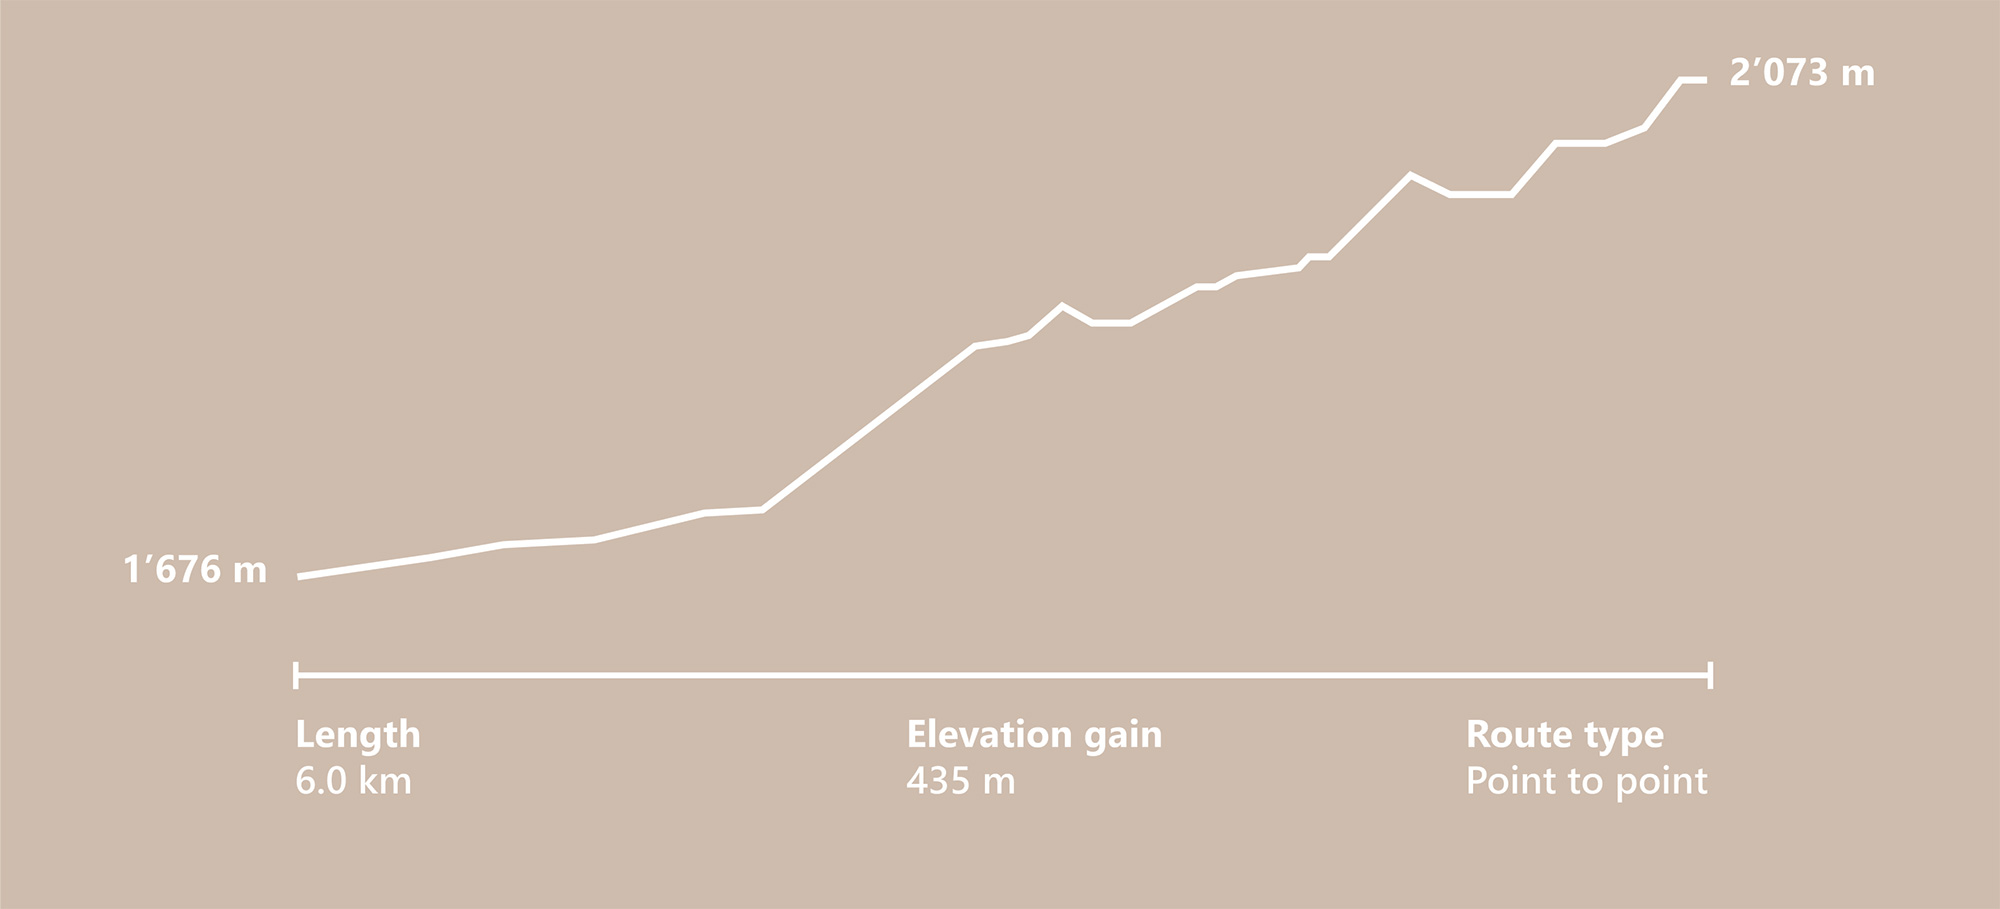
The hike is about 6 kilometers long with 500 meters of elevation gain, one way. Around two-thirds of the path is marked, but the final stretch crosses the glacier plain without signage. You’ll need to walk carefully across the open ice and snow. The ascent usually takes between 2.5 and 3 hours, while the return is a bit quicker along the same route.
It’s a long hike, but still manageable if you’re well prepared. I recommend leaving early in the morning to give yourself time to enjoy the landscape. The ice cave is a popular spot, and chances are you won’t be alone. Starting early gives you more peace, better light, and the freedom to photograph at your own pace.
What to wear and bring for your Zinal ice cave photography hike
Photographing the Zinal ice cave in winter means hiking into a remote and snowy alpine environment. To make the most of your trip and stay safe, it’s important to dress warmly, bring the right gear, and carry food and water with you. There are no shops or shelters on the way, this is pure Swiss wilderness.
Recommended hiking equipment
✅ snowshoes (especially after fresh snow)
✅ hiking poles for stability on icy sections
Winter clothing essentials
✅ insulated, waterproof hiking boots
✅ ski trousers or waterproof hiking pants
✅ a warm and windproof jacket
✅ hat, gloves and an extra layer in your backpack
Don’t forget
✅ snacks and water
✅ a small first-aid kit
✅ your camera gear, well protected from humidity
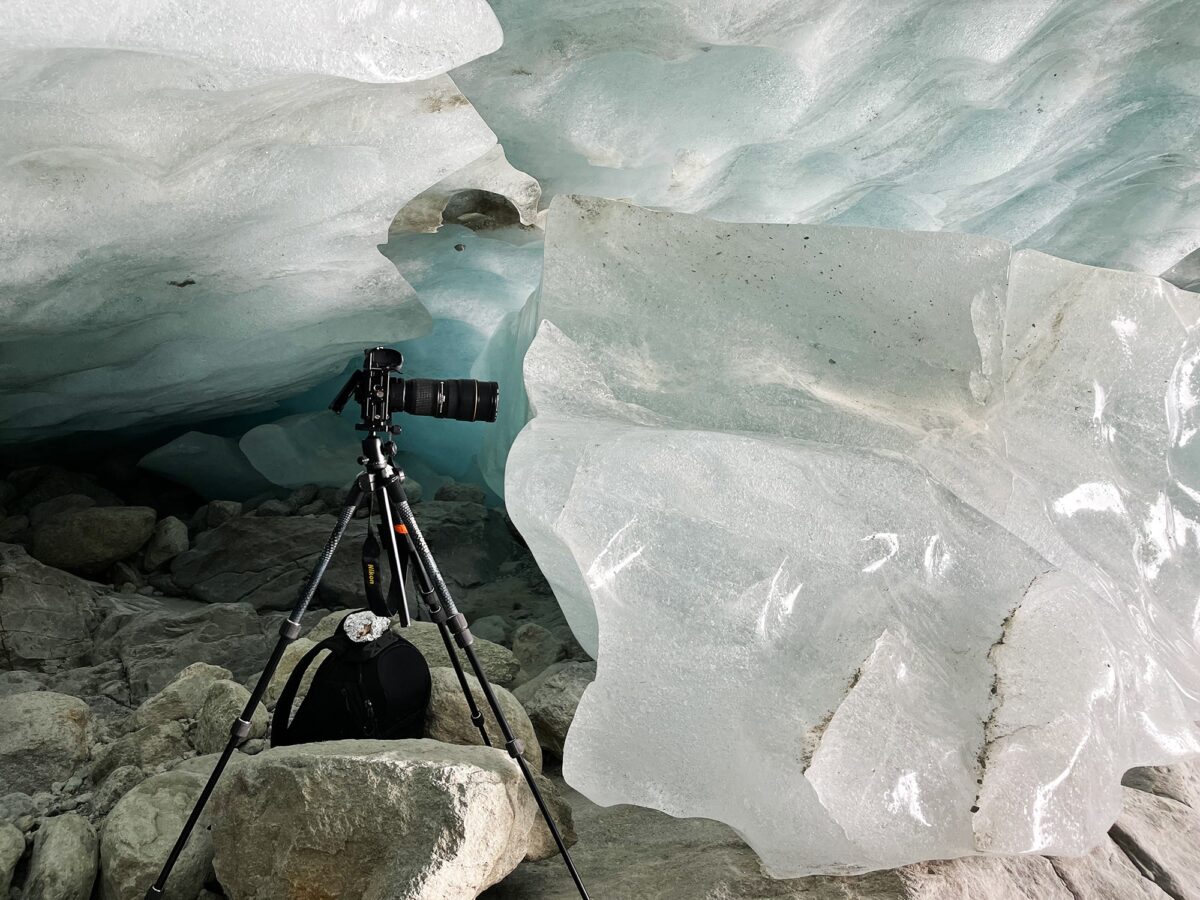
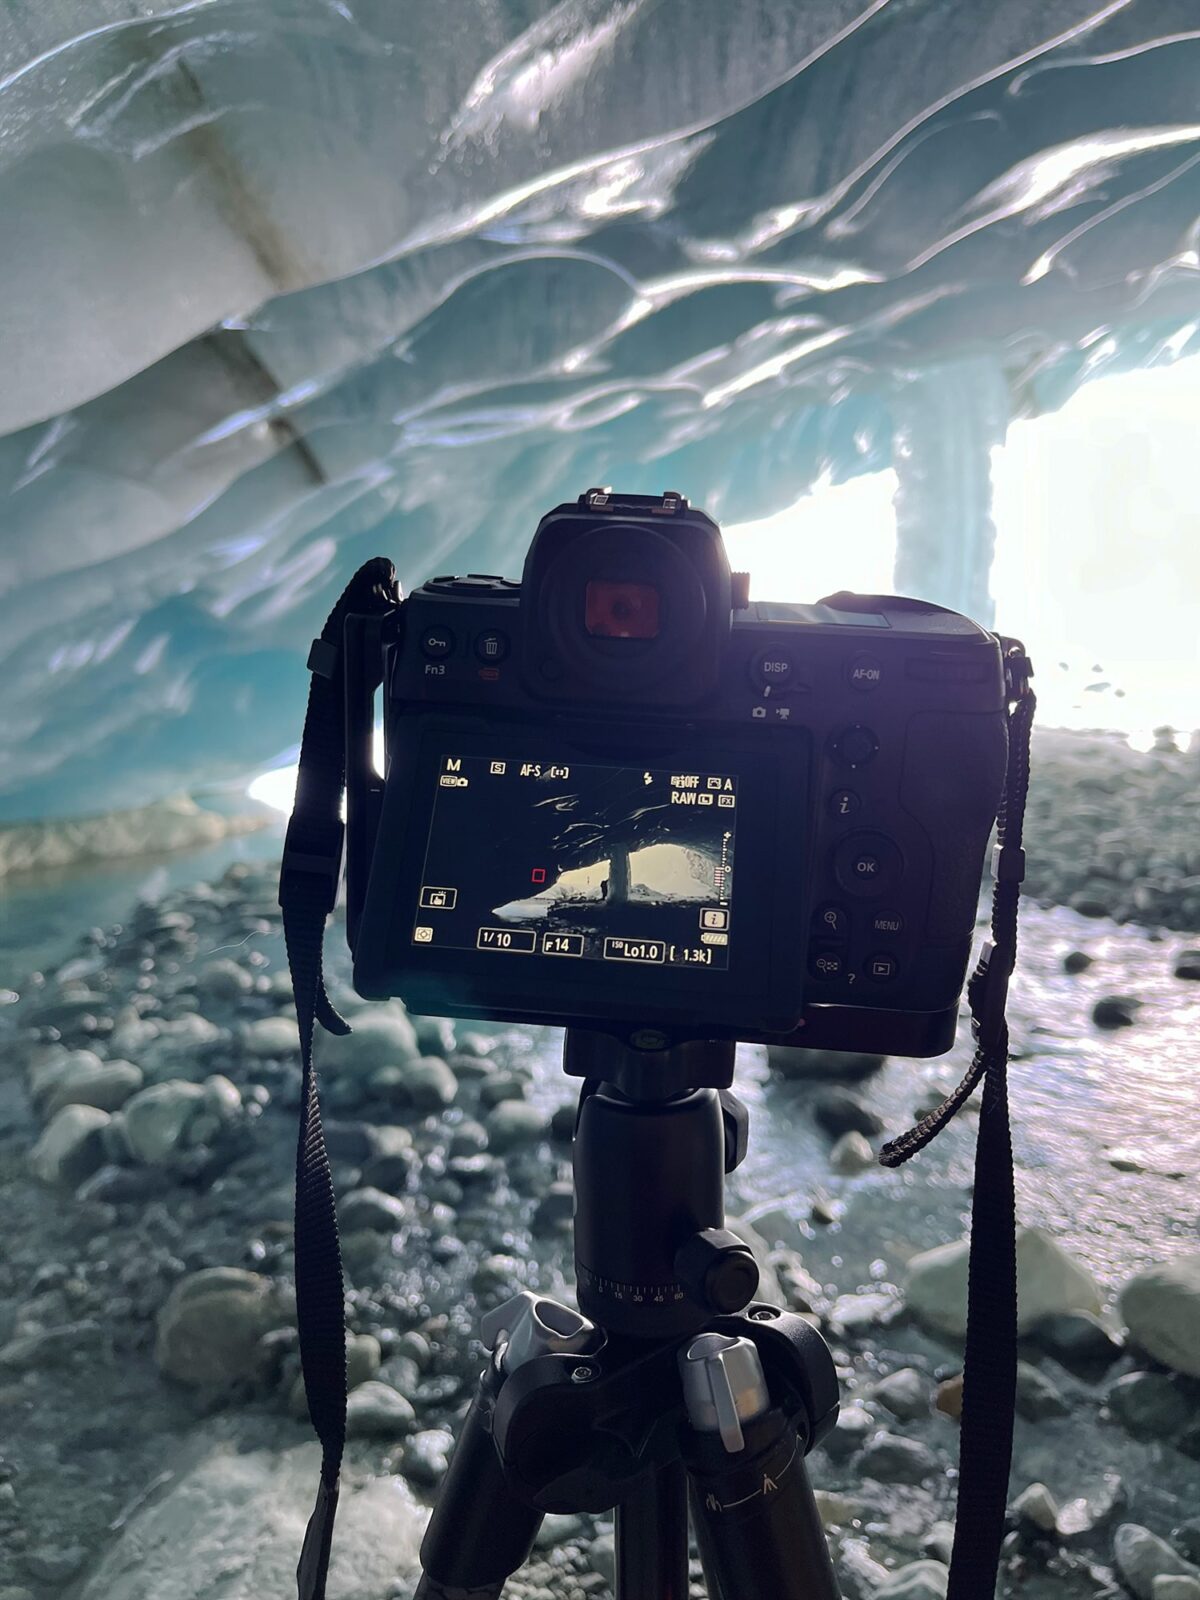
Photo gear for capturing the magic of the Zinal ice cave
If you’re planning to photograph the Zinal ice cave, bringing the right photo equipment is key. Since the hike is long and uphill, it’s best to keep your camera bag as light as possible while still being ready for low-light conditions and icy textures.
Recommended photo gear
✅ camera body
✅ wide-angle lens (to capture the cave’s full scale)
✅ macro lens (for close-up ice details)
✅ sturdy tripod
✅ remote control or intervalometer for long exposures
The cave is naturally dark, and light conditions change depending on the shape and size of the opening, which evolves each winter. A tripod is essential to capture long exposures and bring out the subtle glow and textures of the ice.
Over the past three winters, I’ve seen the Zinal ice cave transform dramatically. In 2025, the structure had almost collapsed, revealing just how fragile this frozen world really is. On previous visits, a small river flowed inside the cave, a beautiful detail to include in your composition, especially when using slow shutter speeds.
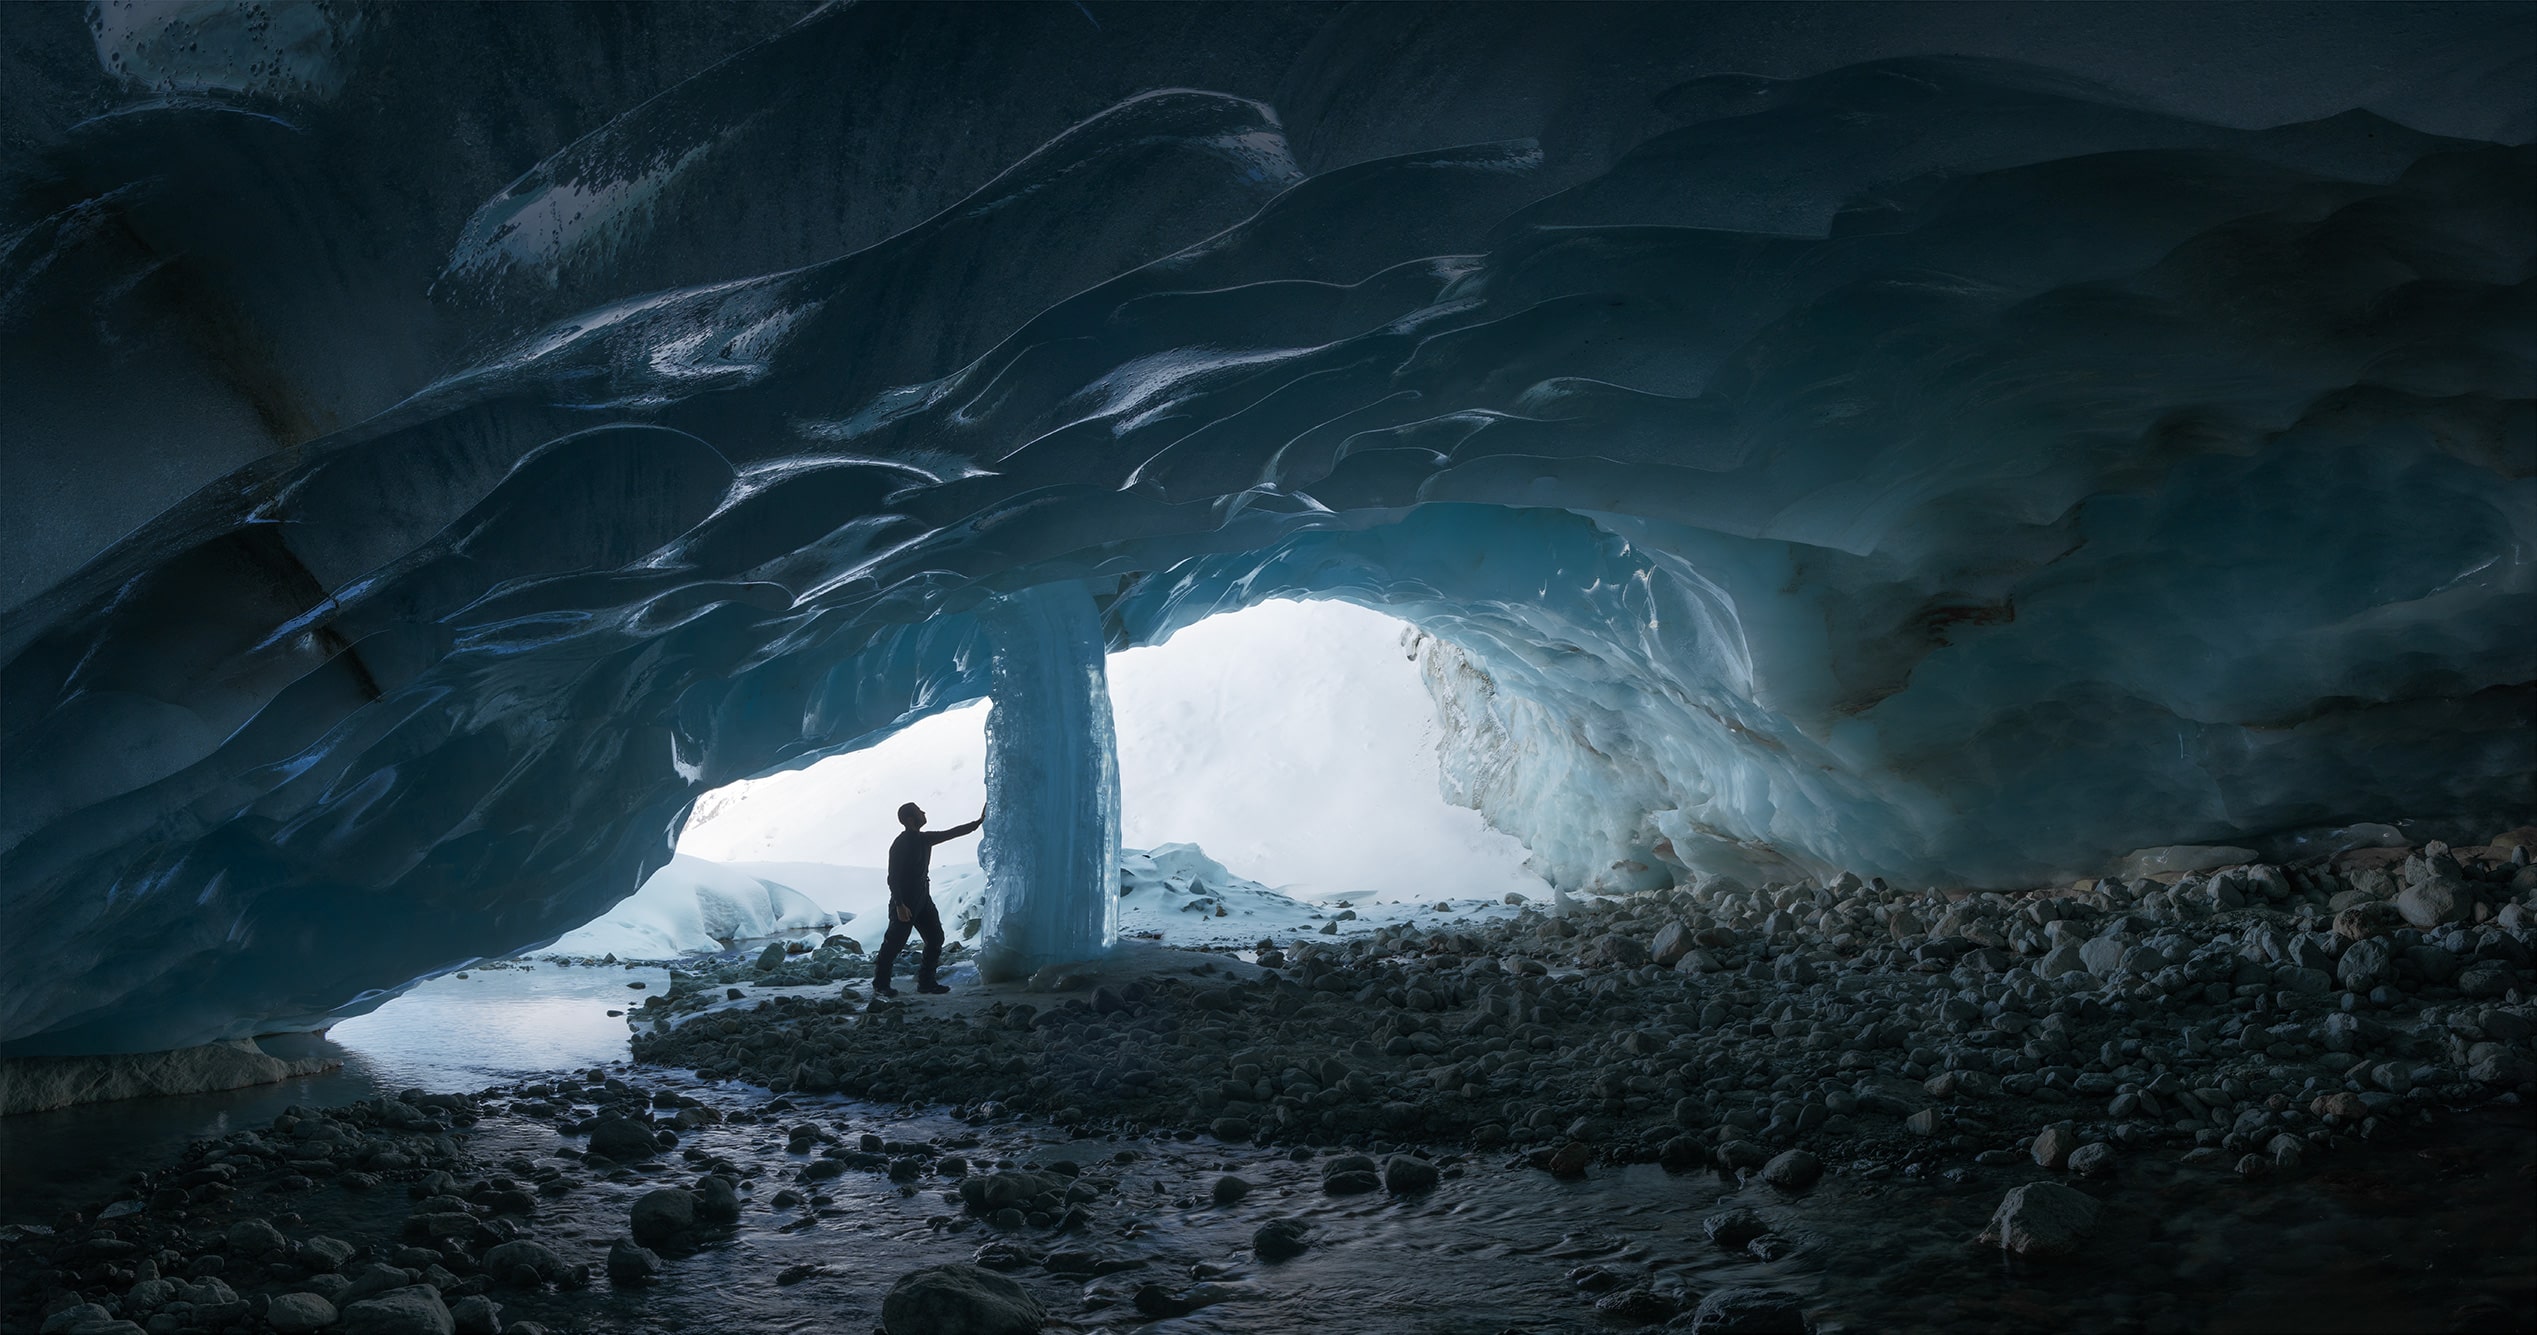
How I photographed this panoramic landscape inside the Zinal ice cave
This image, taken in 2023, is a panorama made of 24 photos, stitched together in Adobe Camera Raw. To capture the full scale and light of the Zinal ice cave, I used my tripod to keep the camera steady and rotated it slowly from left to right, covering the space in overlapping rows.
I started by taking six horizontal shots of the ceiling, then lowered my camera slightly and repeated the process for the middle and lower sections of the cave. My goal was to build a seamless composition that would reflect both the vastness and the fragile beauty of this frozen space.
As the cave was very bright near the entrance and much darker at the back, I double-exposed each frame and later blended them in Photoshop using luminosity masks. Once the panorama was complete, I took one final image — a quiet moment where my friend reached out toward the frozen waterfall. I added this detail in post-processing to anchor the scene with a sense of presence and scale.
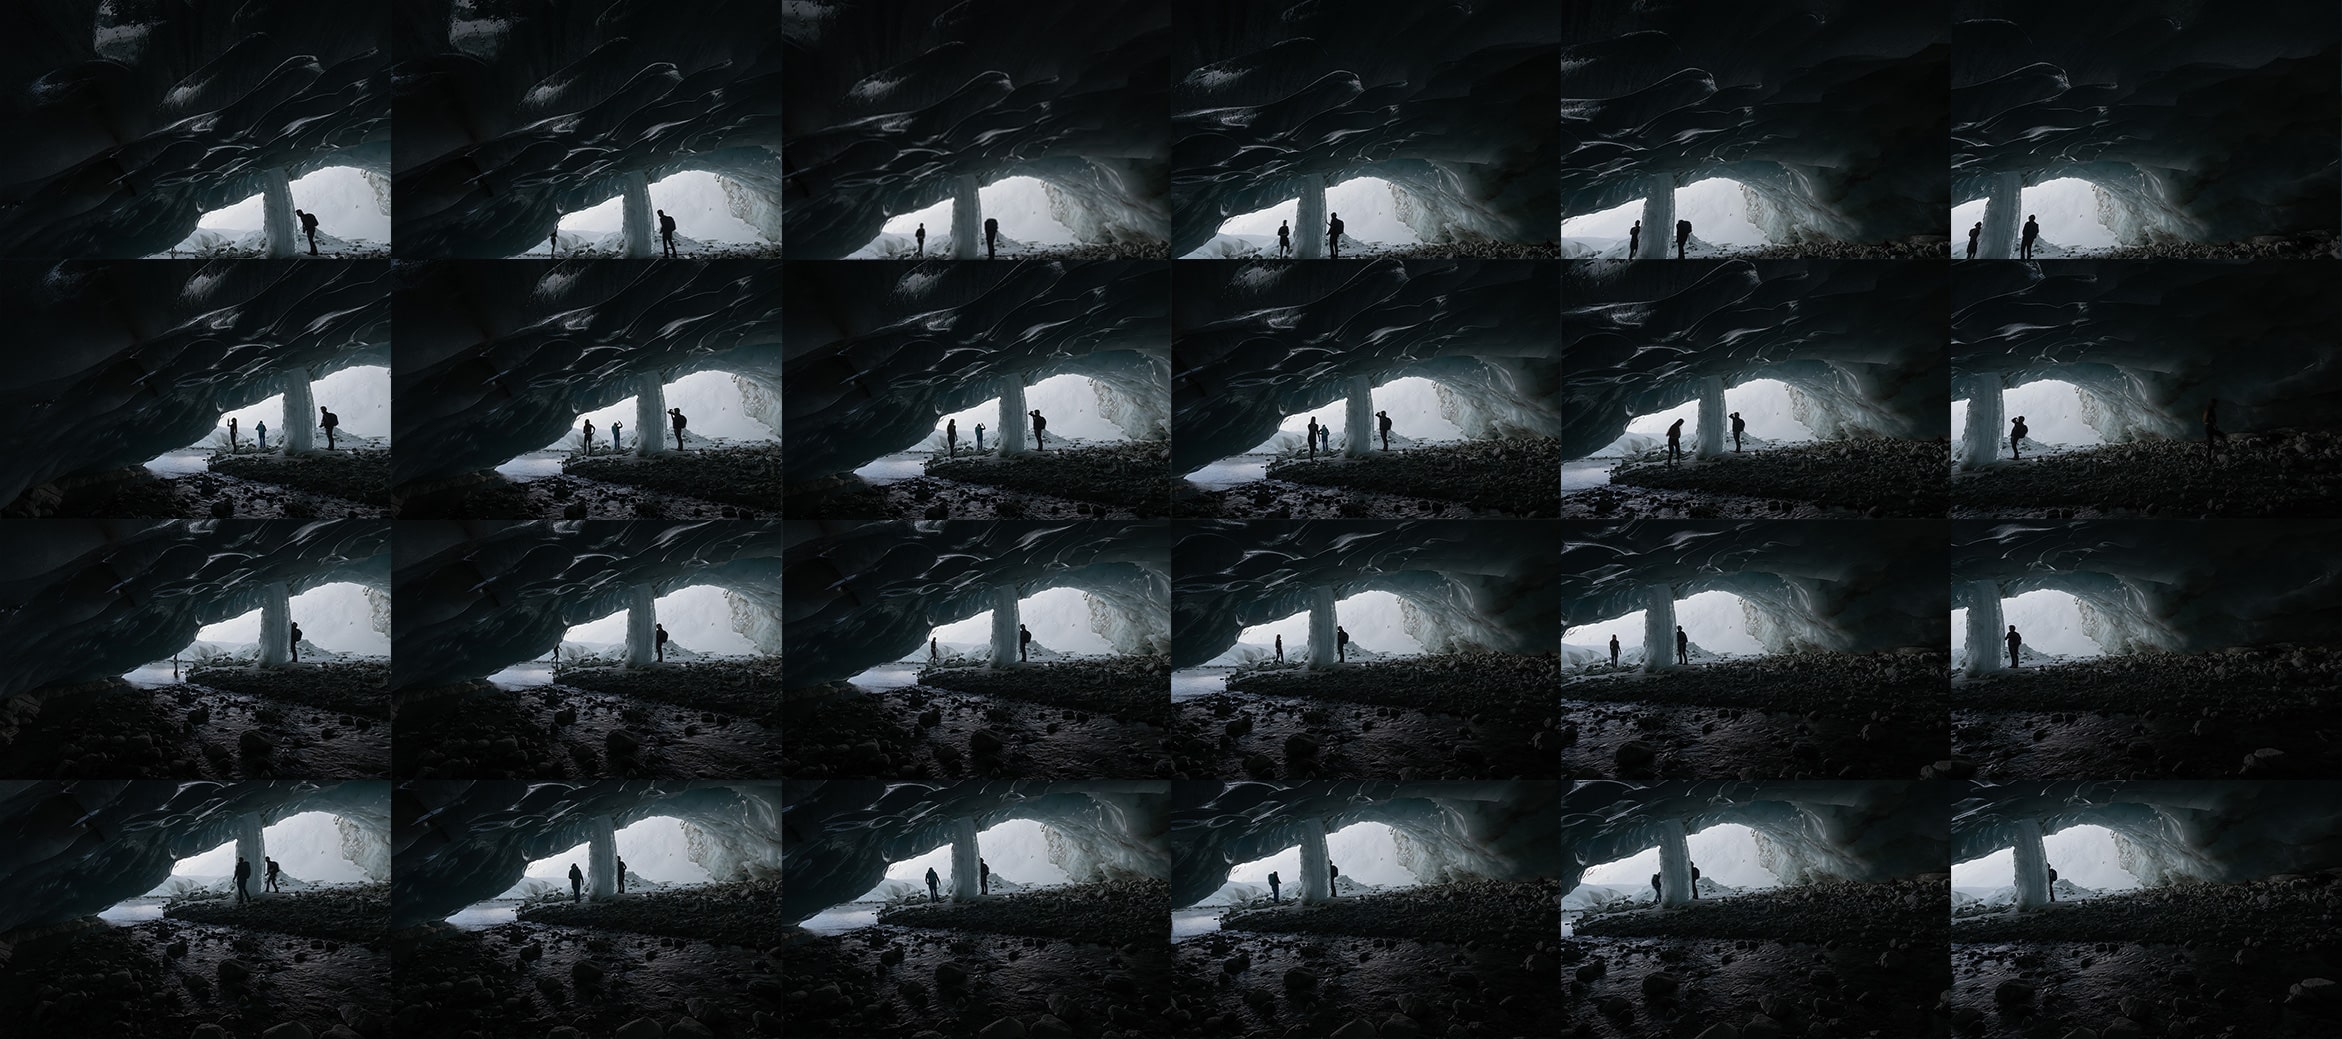
Tips for creating a successful panorama
✅ overlap each frame by at least 30% so your software can stitch them together
✅ keep the same focal length throughout (don’t touch your zoom once you begin)
✅ use a tripod to avoid distortion
✅ always shoot more frames than needed — excess can be cropped, missing data can’t
✅ choose manual settings to ensure consistent exposure
MY GEAR
✅ Nikon Z8
✅ Nikkor 24–70mm f/2.8
✅ Tripod: Manfrotto Element Traveller Small Carbon
CAMERA SETTINGS
✅ ISO 32 — f/14 — 1/8 second
Published on March 26, 2024 by Jennifer Esseiva, updated on July 20, 2025


