On September 7, 2025, I photographed the total Blood Moon in Switzerland, above the Lavaux vineyards near Lausanne. The sky was perfectly clear, and it turned into a long, cold night under the stars.
It was only my second attempt at moon photography. My first try had been a complete failure, so this time I came better prepared.
In this article, I’ll take you behind the scenes: the location, the gear I used, the camera settings that worked (and those that didn’t), and the lessons I learned from photographing the Blood Moon.
How I Planned a Blood Moon Shot with PhotoPills and What Went Wrong
With this Blood Moon, I wanted to try a full Moon session again. The first time, I drove far to an unfamiliar location and it was a complete fail. So this time, I picked a spot close to home: the Lavaux Vineyards near Lausanne.
I used PhotoPills to choose my frame and the exact place to stand with my camera. On paper, everything looked perfect. I imagined the Moon rising behind the mountains in the background.
Well, it did not happen that way. I arrived 1 hour 30 minutes before moonrise. The Moon was supposed to appear around 20:12, but I only saw it at 20:40, and farther to the left than planned. Fail again, but at least this time I could actually see it, and it was still orange, so the eclipse was still in progress. I was probably too ambitious when I selected this location. I am far from mastering PhotoPills, so I should have chosen an easier spot.
➜ PhotoPills app
Change to a Simple Blood Moon Shot: Making It Work on Location
The Moon appeared later and farther left than I had planned. My mountain alignment was impossible, and the actual rise point was above a few houses and a patch of forest. Nothing dramatic, nothing clean.
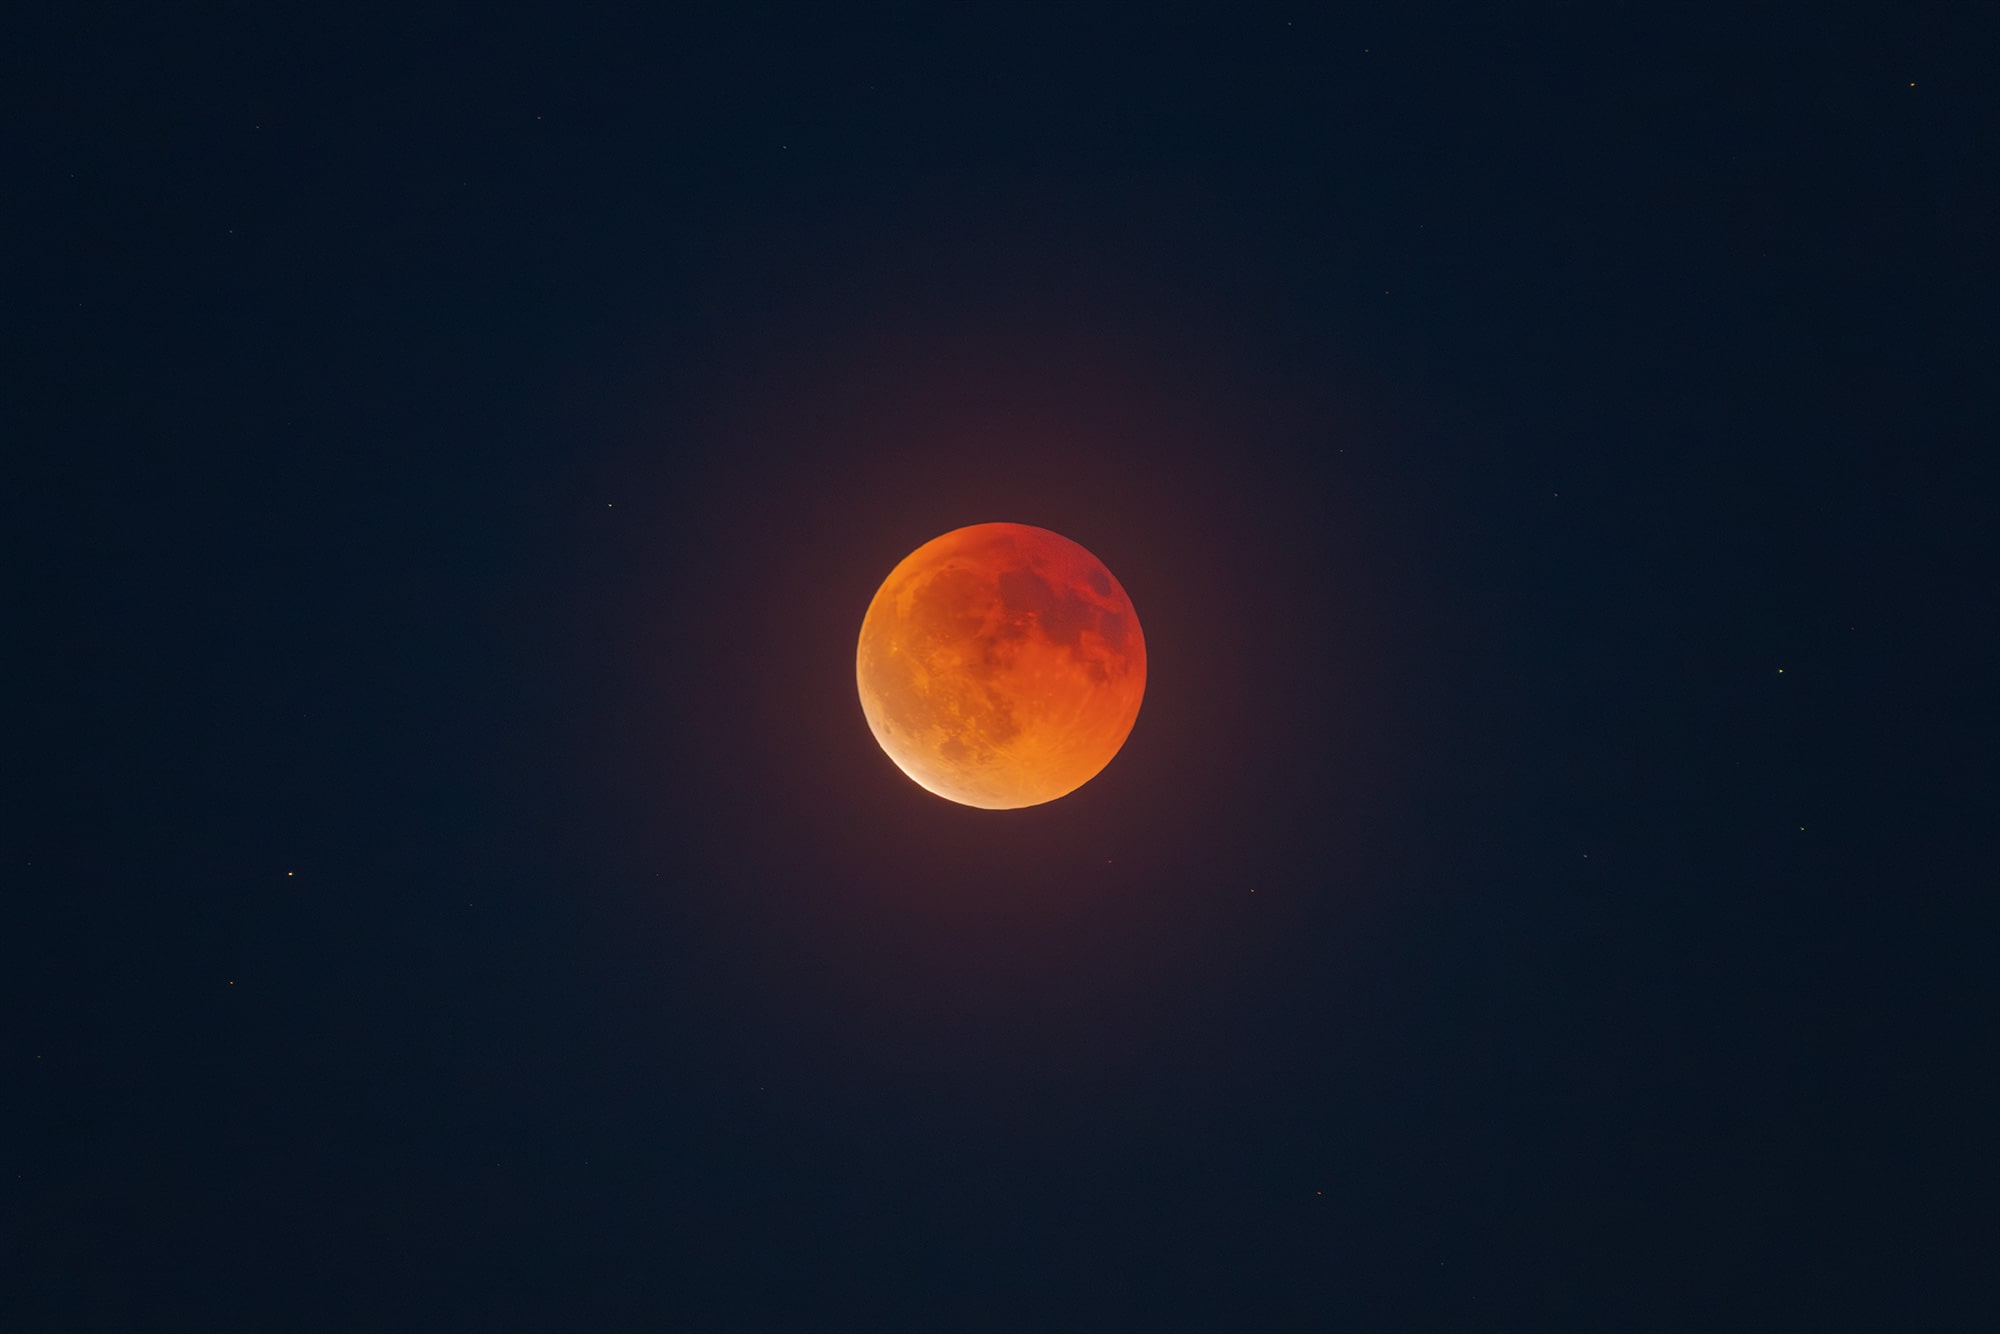
So I changed my plan. My only workable option was to frame the Blood Moon by itself. The good news was that the eclipse was still in progress, so the Moon kept its red and orange hues. I hurried, changed my composition, and captured a series of simple frames in both horizontal and vertical orientation to immortalize the moment.
Camera Settings for the Blood Moon with a 500mm Lens
To shoot the Blood Moon, I used my long zoom lens, the Nikkor 200–500mm. At 500mm, the Moon was nicely visible in the frame. I was quite happy with the results, especially considering the price of this lens. On the final shot, the sharpness is not perfect, but for learning how to work with a long lens and using it only a few times a year, this lens is perfect for me.
My gear
✅ Nikon Z8
✅ Nikkor 200–500mm f/5.6
✅ Peak Design Tripod
The Moon actually moves surprisingly fast across the sky, so I had to use a shutter speed fast enough to keep it sharp without motion blur. To achieve this, I raised my ISO quite a lot and used the widest aperture available on the lens.
Final camera settings
ISO 3200 — f/5.6 — 0.4 s
Blood Moon Timelapse: Simple Vertical Setup to Maximise Time on Location
As soon as I had my single shots, I decided to make a timelapse for four reasons:
✅ A timelapse is quick to set up.
✅ It records every stage of the eclipse, and I can still choose one frame to edit later.
✅ It makes a great Reel on Instagram or a TikTok post.
✅ It maximised my time on location.
For this timelapse, I framed the Moon in vertical orientation to create a Reel for Instagram. The Earth’s shadow was sliding across the disk, so you could see the orange and red tones shift as the Moon climbed. In total, I captured 166 frames, taken every 5 seconds. It was a simple composition that clearly shows the rise and the eclipse moving away.
Artistic Edit of My Single Blood Moon Frame
For the edit, I kept things simple. I warmed the white balance a little, added gentle contrast, reduced noise, and protected the texture so the surface did not turn into a flat red circle.
I also added a subtle red halo around the Moon to make the scene feel a bit more epic. That glow is a creative choice, not a scientific rendering, and I am fine with that. I just wanted a small wow effect for a very simple composition.
Mini recipe (what I actually did)
✅ Warm WB slightly, add a touch of contrast and clarity, moderate noise reduction.
✅ Keep saturation modest so the red and orange tones keep their texture.
✅ Add a soft radial glow on a separate layer, very low opacity, with a natural falloff.
Final Thoughts
This photo session did not go as planned, and I had to improvise to still capture something I was proud of. Even with preparation, you sometimes need to adapt on location.
I learned a lot using PhotoPills, and I am not there yet. I already added the next full Moons of 2026 to my calendar to keep practicing. I also realized I was a bit too ambitious with this shot. In Switzerland, the mountains raise the true horizon and make precise moonrise alignments trickier at my level, so next time I will choose an easier spot.
I hope you enjoyed this behind the scenes with both struggles and small wins. Above all, enjoy the moment. Happy shooting!
Published on September 11, 2025 by Jennifer Esseiva


