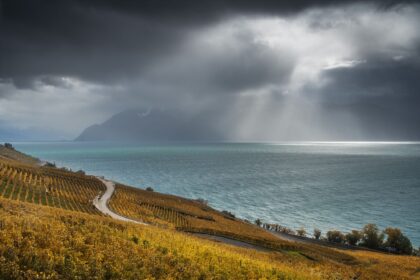
Creating a timelapse might sound intimidating, but it’s actually easy and you don’t need any video editing software. In this guide, I’ll show you exactly how to create a simple landscape timelapse in Photoshop, using just your camera, a tripod, and a bit of patience.
It’s a creative way to tell a story, capture the passing light, or make your Instagram feed come alive. Let’s dive in!
1️⃣ Choose your frame: the foundation of a perfect timelapse
When it comes to timelapse photography, the first and most crucial step is selecting the right frame. Your chosen frame will serve as the foundation for your entire timelapse sequence. Look for scenes with dynamic elements, such as moving clouds, flowing water, or bustling cityscapes, to create captivating footage. Consider the composition, lighting, and potential changes in the scene over time.
2️⃣ Camera setup and needed gear: essentials for a good timelapse
To capture a smooth and professional-looking timelapse, your setup needs to be stable and consistent from start to finish. Here’s what you’ll need:
✅ Camera : any DSLR or mirrorless camera with manual mode will do the job
✅ Tripod : a sturdy tripod is key to keeping your frame steady
✅ Remote control or intervalometer : automates shots at regular intervals for consistent timing
And for the setup itself:
✅ Manual mode : lock your settings to avoid flickering caused by exposure or white balance shifts
✅ Manual focus : set your focus manually so it stays the same throughout the shoot
✅ Fixed exposure : choose your exposure settings at the beginning and don’t change them mid-shoot
3️⃣ Calculating the number of photos: how many shots for 10, 20, or 30 seconds
The final length of your timelapse depends on how many photos you take — and that’s easy to calculate.
Use this formula:
📷 Number of photos = duration (in seconds) × frame rate (fps)
For example:
✅ 10-second timelapse at 24 fps = 240 photos
✅ 20 seconds at 24 fps = 480 photos
✅ 30 seconds at 24 fps = 720 photos
You can adjust the frame rate depending on how smooth you want the final video. Common options include 24, 30, or 60 fps.
4️⃣ Creating your timelapse in Adobe Photoshop: step-by-step guide
You don’t need video editing software to create a timelapse — Adobe Photoshop can do it all. Here’s how:
1️⃣ Import your photos
Go to File > Open and select the full sequence of images.
2️⃣ Create a video timeline
Open the Timeline panel and click on Create Video Timeline.
3️⃣ Adjust the frame rate
In the Timeline settings, choose the frame rate you want (24 fps works great for most timelapses).
4️⃣ Export your timelapse
Go to File > Export > Render Video. Choose your format, resolution, and export location — and you’re done!
Final thoughts: how to create an easy timelapse with Photoshop
Timelapse photography is a beautiful way to capture the passage of time and turn a single scene into a cinematic story. With a well-chosen frame, the right camera setup, and a few hundred images, you can bring motion and emotion into your landscape work, all without complex video software. Photoshop makes the process smooth and beginner-friendly.
And most of all, enjoy the moment. Happy shooting!
Published on August 11, 2024 by Jennifer Esseiva


