Northern lights photography is both a technical challenge and a magical experience.There’s something surreal about standing under a sky that starts to glow green. The northern lights have this magical way of appearing just when you start to doubt they will, and when they do, everything else fades.
Over the past few years, I’ve chased the aurora across Iceland, Finland, and the Faroe Islands. And while photographing them is one of the most unforgettable experiences for any landscape photographer, it’s also more technical (and colder!) than it might seem.
In this guide, I’ll share 8 essential tips for capturing stunning northern lights photos. From gear and settings to planning and composition, everything is based on real field experience. Whether you’re a beginner or just looking to improve your results, I hope this helps you turn that first green flicker into a photo you’ll never forget.

1. Research and plan your northern lights trip
The aurora borealis is one of nature’s most stunning shows, but seeing it requires being in the right place, at the right time. Popular destinations include Iceland, Norway, Finland, Canada, and Alaska, but you can also catch auroras in more unexpected places like the Faroe Islands or even Switzerland, if the conditions are right.
Planning is key. I always use the My Aurora Forecast app to monitor solar activity and track geomagnetic storms. It gives me real-time KP index data and notifications when the aurora is likely to appear.
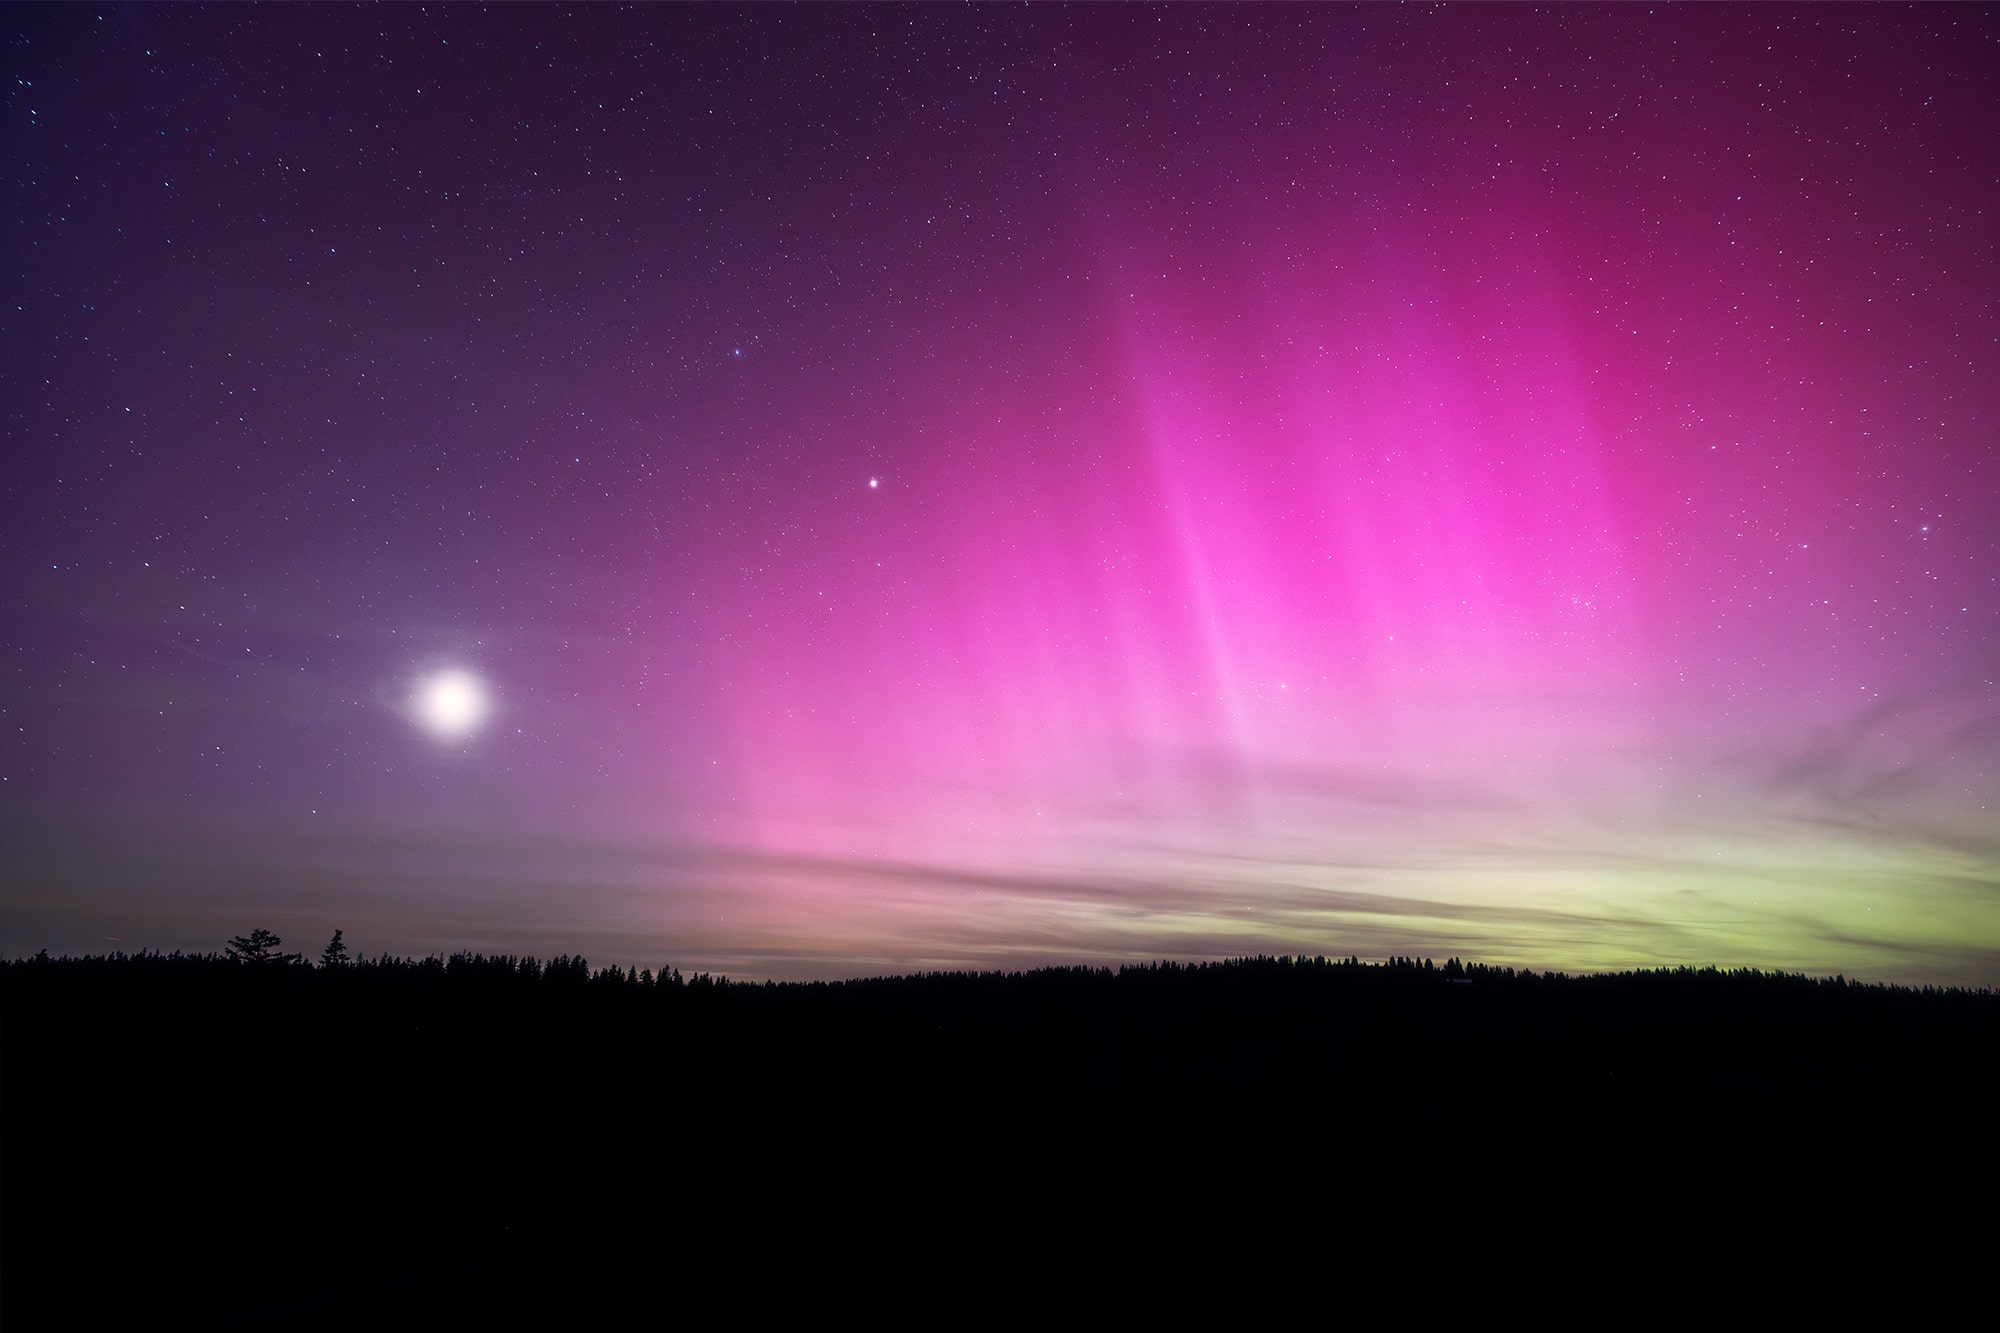
I also rely on light pollution maps to find the darkest skies possible. In May 2024, a rare aurora event occurred in Switzerland. Thanks to my planning, I found a quiet, dark spot near home and captured the magic.
➜ My Aurora app
➜ Aurora Forecast
➜ Light pollution map

2. Use the right camera gear for northern lights photography
To capture the aurora borealis in low light, you’ll need gear that supports long exposures and performs well in the cold. Here’s what I always bring:
✅ Sturdy tripod : essential for sharp, stable shots during long exposures
✅ Camera with manual mode : to control ISO, shutter speed, and aperture
✅ Wide-angle lens : to include both the sky and an interesting foreground
✅ Fast aperture lens (f/2.8 or faster) : to gather more light in dark conditions
✅ Remote shutter or timer : to avoid touching the camera and causing blur
✅ Extra batteries : cold temperatures will drain them faster than usual
✅ Plenty of memory cards : you’ll take more photos than you think (trust me)
3. Learn the best camera settings for northern lights
Using manual settings is essential when photographing the aurora borealis. The right balance of exposure, ISO, and aperture will help you capture both the colors and the motion of the lights.
Here’s a step-by-step guide I use during my night shoots:
1️⃣ Mount your camera on a tripod : long exposures need stability
2️⃣ Use a wide-angle lens : to frame the vast sky and landscape
3️⃣ Set the aperture to f/1.8 or f/2.8 : to let in as much light as possible
4️⃣ Experiment with exposure times : 5 to 25 seconds depending on aurora speed
5️⃣ Adjust ISO between 800 and 3200 : higher ISO means more light, but also more noise
6️⃣ Set focus to manual + infinity : or focus on a distant light and lock it
7️⃣ Bring extra batteries and cards : cold kills batteries fast, and you’ll shoot a lot
These settings aren’t strict rules, test and adapt them to your gear and conditions. The Northern Lights are unpredictable, but with the right setup, you’ll be ready to catch their magic.


4. Use a remote shutter release (or your camera’s timer)
To avoid camera shake during long exposures, it’s best not to touch your camera when you press the shutter. That’s why a remote shutter release is one of the most useful tools for northern lights photography.
I personally use the Rollei Wireless Remote Shutter Release to keep my shots sharp and steady. It lets me trigger the shutter without physically touching the camera, which is especially important in the cold, when even small movements can blur your image.
If you don’t have a remote, no worries, just use your camera’s built-in timer. It gives your setup time to settle before the exposure starts.
Either way, this small step will make a big difference in the sharpness and clarity of your aurora shots.
➜ Rollei Wireless remote shutter release
5. Create a strong composition with foreground flements
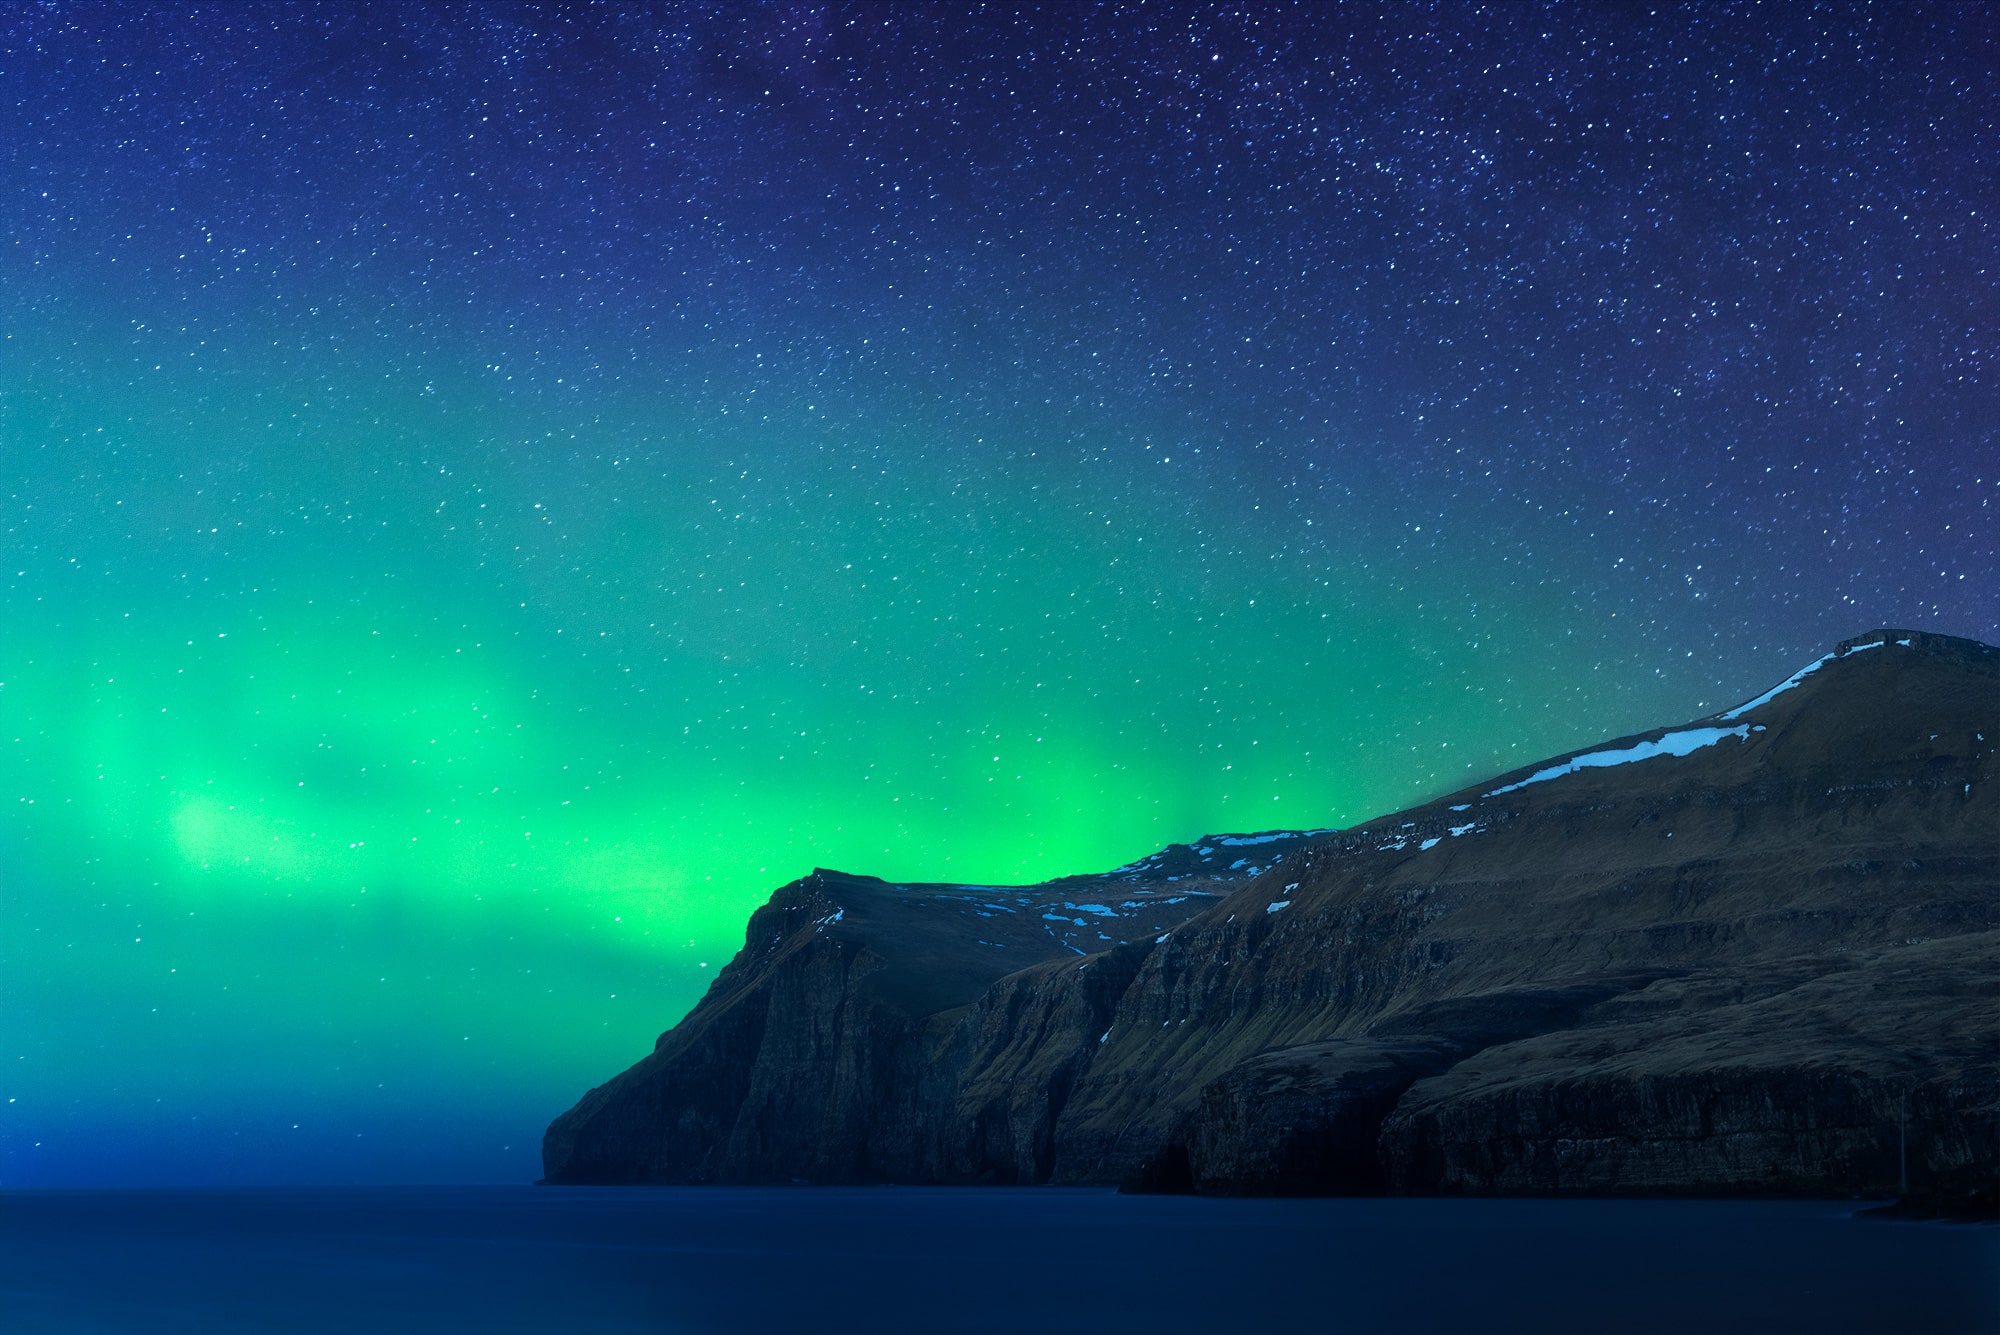
A beautiful aurora is only half the image. The other half is how you frame it. Adding mountains, trees, lakes, or even buildings gives your Northern Lights photos depth, context, and emotion.
I always scout my locations during daylight to find interesting elements I can include in the frame. That way, when the lights appear, I already know where to stand and what angle to use.
To prepare, I use tools like Google Maps and Google Earth to study the terrain and plan compositions ahead of time. This is especially helpful in remote or unfamiliar areas.
The aurora is magical on its own, but paired with the right foreground, it becomes a powerful landscape photograph that tells a story.


6. Stay warm to stay out longer
Photographing the Northern Lights often means standing still for long periods in freezing temperatures. Once you’ve found your spot, you won’t be moving much, so dressing in warm, layered clothing is essential.
I always wear multiple layers to stay warm and comfortable, especially on windy or snowy nights. Thermal clothing is the first thing I pack, followed by good outerwear and accessories that protect me from the cold without making it hard to use my gear.
✅ Thermal clothing : to keep your core warm.
✅ Waterproof boots : essential for standing on snow or wet ground.
✅ Gloves : to protect your hands while still allowing you to handle your camera.
✅ Hat : to retain body heat and keep your head warm.
Being properly dressed allows you to stay outside longer, stay focused, and enjoy the experience without constantly thinking about the cold. Comfort means more time, more patience — and better chances to capture the perfect aurora photo.
7. Wait, watch, and don’t give up
The northern lights are beautiful, but they’re also unpredictable. You might spend hours outside with no guarantee of a show or the sky could light up just as you were about to leave. That’s why patience is one of the most important tools you can bring.
When I arrive on location, I stay alert, my camera settings ready, and my eyes scanning the sky. The aurora can appear and disappear in minutes. Being prepared means I won’t miss the moment when it finally shows up.
It’s not always easy to wait in the cold, but persistence pays off. The most magical displays often come after long stretches of nothing. If you’re willing to stay just a little longer, you might witness something unforgettable.
8. Experiment with exposure times
The way you capture the aurora depends a lot on how long your shutter stays open. A few seconds can reveal delicate textures and fast movement, while longer exposures will smooth everything into flowing light trails. Both approaches are valid, it just depends on the story you want to tell.
When I’m out shooting, I adjust my exposure time depending on how active and fast the aurora is. A soft glow moves differently than a pulsing storm, and your camera should follow that rhythm.
✅ Shorter exposures (5 to 10 seconds): capture more detail and structure in the lights
✅ Longer exposures (15 to 25 seconds): create soft, dreamy ribbons of color
By trying both options, you’ll discover what works best in the moment and add variety and depth to your Northern Lights portfolio.
When the sky starts to dance
Photographing the northern lights isn’t just about technique. It’s about patience, intuition, and being fully present in the moment. No two auroras are ever the same, and that’s what makes them so special.
I hope these tips help you feel more confident when facing the night sky, whether it’s your very first time or your tenth. The cold, the waiting, the long exposures… it’s all worth it when the sky begins to dance.
If you’ve already experienced this magic, feel free to share your favorite moment in the comments. I’d love to hear your story.
Published on July 31, 2024 by Jennifer Esseiva


